Call 781-294-8425


Inflatable Game
*If you have any questions, contact Happy Jump, Inc.
Happy Jump, Inc
P.O. Box 1025
Sun Valley, CA 91353
Phone 818.504.3991
Fax 818.504.3990
www.happyjump.com
Info@happyjump.com
Table of Contents
Introduction
Safety Operating Instructions
Preparation & Safety Checklist
Site Layout
Tools and Equipment
Setup Procedures
Deflation & Packing Instructions
Problems
Additional Signage & Safety Guidelines
Maintenance
Warranty
Appendix
Introduction
Congratulations on your purchase of a brand new Happy Jump, Inc Inflatable Bouncer. We are pleased to inform you that this unit has passed our meticulous inspections. You can rest assured that this inflatable unit is the best in the industry.
We take safety very seriously and as we pass this inflatable unit to you, we also pass on the responsibility of providing the utmost safety. It is very important that you and anyone who operates this unit reads and understands this manual entirely.
This manual will explain in detail how to check site location, set up, how to repack, and maintain this unit. In addition it will provide good general information that will be helpful in numerous situations.
If you have read this manual and have suggestions and/or questions, please feel free to contact us with your comments.
Thank you once again and we hope you enjoy years of uninterrupted service with your new inflatable.
Upon Arrival/Inspection
Upon arrival of your equipment, you should check to make sure that you have received the following items. If any item is missing, please inform us immediately.
- Inflatable Game wrapped on a pallet
- Spikes
- Inflation Fan
- Safety Instruction Printed on the Unit.
- Accessories Box (if applicable)
- Business Card Holder Sewn into the unit.
- Repair Kit
- Custom printed banner with your company name and telephone number
- Steps (if applicable)
- Water Hose
WARNING
- INFLATABLE GAMES ARE VERY HEAVY. WHEN LIFTING ANY TYPE OF HEAVY WEIGHT, BE SURE TO LIFT WITH YOUR LEGS AND NOT YOUR BACK. IF IN DOUBT ABOUT ABILITY TO MOVE SOMETHING, GET HELP.
- DO NOT OPERATE THIS UNIT WHILE RAINING OR IN WET CONDITIONS
- DO NOT OPERATE WHEN WIND EXCEEDS 15 MPH AND/OR TEMPERATURES LESS THAN 40°F.
Interactive Game
-For particular operation information about your specific inflatable, refer to the appendix.
-Each specific unit has different requirements for tie downs, operators, etc.
The operator is responsible for:
- Monitoring inflation of the unit
- Screening and admitting patrons
- Making patrons aware of the rules
- Assisting patrons with protective gear
- Monitoring patrons while using the ride
- Cleaning and maintaining protective gear
- Matching patrons as to size, age and ability
- Maintaining order and compliance with rules
Safety Operating Instructions For Inflatable Ride Operator
- Children’s safety depends on the presence of an operator. Always have the inflatable unit supervised by an operator who has reviewed and understands the safety rules.
- Do not setup near swimming pools.
- Keep age and size of riders comparable. Extra caution is needed for children ages three and under. Never allow older kids to bounce with children three and under.
- No one should be permitted to ride the unit if weight exceeds 200 lbs.
- Individuals with head, neck, back or other muscular skeletal injuries or disabilities, pregnant women, small infants and others who may be susceptible to injury from falls, bumps or bouncing are not permitted on or in the unit at any time.
- Number of riders should be limited to the number specified on the label located on the back of the jumper near the air tube.
- Absolutely no pets are allowed on or by the unit at anytime.
- Do not allow climbing on the unit or netting of equipment by anyone inside or outside of the inflatable unit.
- Do not allow anyone to jump on the inflatable near the door of the unit.
- No flips wrestling or extreme horseplay is allowed while on the ride.
- Do not allow riders to bounce closer than four feet from each other.
- Keep riders from putting netting in their mouths.
- No Food, drinks, gum, candy, confetti or trash in or around the inflatable.
- Do not allow any silly string in or around the inflatable, it will damage the unit.
- No one is allowed on the ride while it is being inflated or deflated.
- Unit must be anchored prior to and during operation.
- Persons not following the safety rules should be asked to leave.
- Do not spray water on the ride for any reason.
- If wind becomes excessive (15 mph or more), unload occupants and deflate the ride.
- Do not allow anyone to put fingers/hands or any objects in to the fan intake, motor, motor housing or outlet when running.
- Check stakes regularly to ensure they are tight.
- Check the blower/inflation tube regularly to ensure there is not any excessive leakage.
- Check GFCI at least once per event after the initial setup.
- Only one person may slide per sliding area.
- Do not slide head first.
- Do not jump or dive in the slide.
- Only one person per lane on obstacle courses and slides.
- The landing area of a slide must be clear before the next person begins to slide down.
- Operator should be present at the climbing area to help climbers or remove those who are not capable of climbing.
- If the unit includes a pool, the pool must be filled before riders can begin sliding.
Preparation & Safety Checklist
- Do not inflate in high winds or rain. Maximum high winds are 15 mph. While ride is operating and winds become excessive, unload all occupants, and deflate the ride.
- Do not inflate at temperatures less than 40 degrees F.
- Use an adequate three-wire extension cord, minimum 12 gauge. Never cut or remove the round grounding pin from the cord.
- Always connect the GFCI (Ground Fault Circuit Interrupter) extension cord adapter to any cord before plugging into a power source. This reduces possibility of arcing the GFCI contacts. A GFCI extension cord adapter can be purchased at most Do-It your self stores, i.e. Home Depot, Builders Square, Lowe’s, etc…
Site Layout
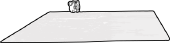 Make sure area is clear of any debris and that you have 5 feet clearance around and above the perimeter of the inflatable |
|
Tools & Equipment
(1) Sledge Hammer
(1) Hand Truck
(1) Ground liner (Tarp)
(1) 50′ or 100′ 12 gauge extension cord
Setup Procedures
|
S E T U P I N S T R U C T I O N S A. 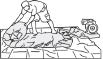 B. 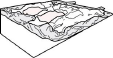 C.  D.  D.  E. 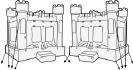 A. Place and line up the unit. Unroll the blower tubes and the unit. B. Unfold the sides and straighten them out. C. Stake the inflatable D. Close the opening of one of the bower tube. E. Plug the fan power cord and slide the blower opening into the tube. |
Setup Procedures
|
Deflation & Packing Instructions
A.  A.  B.  C.  D.  E.  F. 
A. Turn off and unplug the blower fan and unhook the straps on the other blower tube. |
For the Obstacle Course (2 units) do the following instructions for both of the units.Before Deflating Before DeflatingStep 1: Before breaking down any game, inspect the games for any damages and repair as necessary. Remove all accessories that may be applicable to the game. This may include items such as harnesses, backing plates, bungee cords, etc…Be sure to use a quality broom and sweep the surface of the game free of any debris. Check to make sure that no sharp objects have fallen into the seams of the game, i.e. pens, the rolling up process. Also make sure the game is dry, if not please dry the game. DeflatingStep 3: Unplug the blower fan. As the game begins to deflate, go around and unhook the straps that secure the blower tube to the blower. Unhook the straps on the other blower tube to allow air to escape. FoldingStep 6: Fold in the base of the unit all the way around and walk around the unit to remove any air. RollingStep 9: Prior to rolling the game, make sure that there is no excessive air and the fold is firm. Start your roll from the front of the unit and roll it up like a sleeping bag. Keep pushing and flattening the roll as you go. You may also want to have someone walk on the roll in front of you. Standing the GameStep 11: Place the storage bag over the end of the game and work it down as far as you can. It is important that you work the bottom of the bag down to the top of the roll. Rotate the game 180 degrees and pull the bag over the top of the game/Tie the bag closed. Use a two wheel dolly to transport the blower and accessories back to the same area. Now you are ready to pack up and leave. |
Complications
Incase of rain and/or lightening, have children exit the unit and turn off the motor. Fold the unit and cover it with the tarp as soon as possible to help keep it dry. When rain stops use towels to dry the inside of the unit, then resume play.
Power failure- If the fan motor stops, riders must immediately stop jumping and calmly exit the bouncer. Hold open the exit flap of the unit and guide the riders out. Overloading an electrical circuit is the most common cause of the fan stopping; reset the fuse panel, make sure the fan motor has a dedicated circuit.
Additional Signage & Safety Guidelines
Operators must make customers aware of the following information before allowing them to participate on any inflatable games. We recommend having a sign made that can be placed in front of the game, and large enough to read from a minimum distance of 50 inches.
We want you to have the most fun possible while helping us maintain the highest level of safety for you and your operators. You should not participate in these games if you have any of the following conditions:
- Current or previous injury to the back or neck.
- Any respiratory conditions, including, but not limited to asthma or bronchitis.
- Pregnancy
- Chronic knee or other joint conditions
- Any heart or circulatory conditions
Remember, these games do require a certain amount of physical exertion, and you must judge for yourself your ability to participate.
If you do decide to participate, we suggest you do the following for your own personal safety.
- DO NOT ENTER THIS GAME IF AN ATTENDANT IS NOT PRESENT!
- Follow the attendant’s instructions closely. They are there for your own safety
- Remove all loose and dangling jewelry and/or clothing, bracelets, watches, and earrings.
- Remove shoes
- No flips, wrestling, or extreme horseplay allowed while on ride.
- Do not bounce closer than four feet from each other.
- Do not bounce on the step or near the doorway.
- No sharp objects allowed inside moonwalk.
- No climbing or hanging on the outside walls or roof.
- No one is allowed on the ride while it is being inflated or deflated.
- No silly String or glitter is to be used. Do not tape or apply anything on to the ride.
- Stay off netting at all times
If you have any questions, or are unsure of your ability to participate, ask the game attendant for assistance.
Equipment Maintenance
Keeping your unit well maintained will ensure the unit a longer life. That is why we strongly recommend cleaning your inflatable unit before and after every rental. This can be a brief spot cleaning. This will give you the opportunity to inspect the unit for wear and/or tear damage. Check the underside as you fold and roll the unit for scuffs or tears. You should also give it a quick disinfecting spray so that it is ready for the next time.
Monthly
- Schedule a time once a month to set each unit up and go over it in detail. Check the underside for weak spots or scuffs and apply patches as needed.
- Blow the unit up, and deflate to check the roof. Spray an all-purpose cleaner and wipe it down.
- Spray disinfecting cleaner in the blower tube so that it can help keep the inside clean. Re-inflate the unit and work your way from one side of the entrance all the way around the unit. Spraying down and wiping as much of the unit as possible. You may want to bring a stepladder so that you can reach the higher sections. Climb inside the unit and do the same thing.
Cleaners
- Do not use chlorine based cleaners or bleach cleaners as it may damage the threads.
- Do not use bathroom cleaners.
- Do not use any cleaner that warns, “Do not use on soft vinyl”.
- Do not use any abrasive cleaners.
- Keep in mind that children are going to come into close contact, so be sure to use a cleaner that is non toxic and safe.
Always test a new cleaner on a scrap from your repair kit before putting it in your unit.
To repair tears up to 12″, use the “single patch method,” as follows:
- Cut an oval patch of proper material approximately 2″ larger than the tear.
- Clean the surface around the tear with a recommended solvent.
- Apply the proper glue to both the patch and the fabric around the tear.
- Let glue dry for 3 minutes.
- Press the glued sides together for 15 minutes, until the glue has dried.
- Begin inflation and check for leaks around the patch.
To repair a larger tear, use the “double patch method,” as follows:
- Cut the appropriate size patch as described above.
- Clean the interior surface around the tear, apply the glue, let dry and press together as described above.
- After the inside patch has dried for 15 minutes, apply another patch to the outside in exactly the same way.
- Begin inflation and check for leaks around the patched area.
Motor Blower
An electrical motor blower is included with this game, for instructions and technical data for the blower, please refer to the motor blower box. (A complete owner’s manual for your motor blower is in the container, if it is missing, contact the manufacturer for another copy.
Limited Warranty
Happy Jump, Inc: Sells a wide range of products and warranties vary by product. Please ask a representative to disclose a particular warranty for the product(s) you are purchasing, if you do not see that information here. Our warranty specifically excludes freight in either direction, and freight is the express responsibility of the purchaser.
Happy Jump, Inc: Reserves the right to inspect all warranty claims and make a final decision based on the validity of the claim.
Happy Jump, Inc: Will make a good faith effort for prompt correction or other adjustment with respect to any product that proves to be defective within the limited warranty. Contact Happy Jump, Inc. toll free at 877-244-5867 to discuss any warranty concerns you may have.
Inflatable Units: All inflatable games manufactured by Happy Jump, Inc. are warrantied to the original purchaser, either directly or through a qualified reseller, against defects in workmanship or materials for a period of two years on bouncers and one year on interactive games from the date of purchase. Normal wear and tear is expected and is not covered by the warranty.
Peripheral Parts: Peripheral parts do not have a warranty. However, we will honor an obvious defect in workmanship or material when these parts are used under normal conditions for a period of 30 days from date of purchase. The parts in question must be returned to Happy Jump, Inc. for inspection and opinion. The decision of Happy Jump, Inc. is final.
Other Equipment: Each manufacturer offers a specific warranty on the products they make, and these warranties will be supplied upon request to the purchaser.
Return Policy: All games and products manufactured by Happy Jump, Inc. are considered custom built per order. In the event a product is returned for any reason not the fault of Happy Jump, Inc., a 25% restocking fee may apply.
Appendix
Warning
-DO NOT OPERATE WHEN WIND EXCEEDS 15 MPH

Slip & Slide Double Lane w/ Pool
(Model SW4303)
-The total dimensions & weight for this unit are:
*40 L x 10′ W x 7.5′ H
Total – 285 lbs (weight of unit)
– Maximum Participants:*
* 2 Children
(Max. weight 400 lbs. in total)
– Minimum Height Requirement: 36″
-This unit has a total of 6 tie downs:
-Each tie down location must be either staked to the ground with at least 18″ long stake or sandbag with at least four (4) – 50 Lbs. sandbag on each anchor.
-For Setup & Take down procedures, refer to pages 5-8
-This Inflatable Game Requires 1 Motor Blower.
ATTENTION:
-One (1) operators are needed to operate this unit when used in a public area.
-Allow only the number of adults or children specified on the ride information data plate are permitted in the unit at one time.